Alright guys here it is. The long anticipated first post on a pair of constructed horns. Originally these were horns meant for the Lolita Loki Avengers costume. The costume is still gonna happen, for NYCC in October, but I will not have it done for Otakon. These are tester horns, I'm making these as a test of the method I've created. That, and I made these the wrong shape to be Loki's horns... so Loki will have to wait. Now all I've used is card board and a hot glue gun. I love these materials. I never realized how awesome card board is as a sculpting medium, and the hot glue was perfect for fast and easy gluing. Normally you all have probably heard me go on about the E6000 glue and how awesome it is. It still is really nice to have, but for a project like this, having a fast cool down/ dry time is essential.
So, firstly, get your materials!
 |
| Careful with that. |
I raided the recycling bin in the garage and pulled out this box. I used corrugated cardboard and I'll explain why later. Then I got hot glue. Any kind will work, I picked mine up from AC Moore. The next step is to cut open the box so that it's spread out into one big piece, like so:
 |
Spread that cardboard out
like it's Butter! |
This is gonna allow you to gauge how much card board you're going to
need. Make sure the pieces you cut are not interfering with the folds
and bends of the box, otherwise your cardboard will bend in the
direction of the fold. Next you're gonna want to cut the basic shape of
your horns.
 |
| So horny right now XP |
Cut two of this basic shape. Don't question me just do it. These pieces will act as a 'spine' for the next few steps and will determine almost everything from this point onwards including the width of the pieces. I've drawn lines in preparation for the next step, about every half inch or so. As you can see they are the wrong shape for the Loki horns, but at least they'll look cool. Now since I want these horns to be curved I need a strong supporting structure for any coverings that will come later and they will also need to be curved. Basic shapes are our friend people. We can't create anything without the sphere, cube, cylinder, and cone. So because I'm building a 3D structure out of flat pieces, I need to cut shapes that are rounded yet flat.
 |
| Cut circles! |
Cut circles that are the same diameter as the lines you should have drawn on the basic shape. Draw the circles onto your spare cardboard. Cut out the circles and then cut them in half. Glue each half onto opposite sides of the basic horn shape following those lines you made. Once you have that finished on both sides of each horn, the time has come to start covering the open spaces.
First prep your card board. I told you there was a reason why I picked corrugated cardboard. Lay a section of cardboard flat on the cutting surface. Take an Exacto knife or other incredibly sharp slicing utensil and score the surface of the card board. Corrugated cardboard is hollow, if you look at it from the edge you can see the top and bottom surface pieces, and then a third wobbly piece inside holding the two together. You're going to slice through that first layer of card board in the dips of that third layer. Do not cut all the way through the card board or you won't be able to shape it the way you need to. What this step does is allow the card board to bend and flex freely while still being a solid piece. Basically you'll be able to comfortably wrap the cardboard around a pencil without creases or struggling. Score a few broad pieces of this in prep for the next few steps. This is what your card board should look like:
 |
| Please ignore the head. |
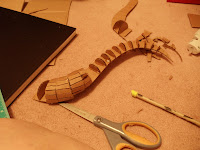
Now that you have your cardboard prepped and ready to go, this is where it gets intuitive. I cut strips of the scored card board to match the spaces in between the half circles. Now my circles are not evenly spaced, they were wider at one end and narrower at the other. I had to cut my strips in an almost triangle shape. You'll have to measure and cut each segment to fit perfectly over each space. Once you've cut your piece, hot glue it down and try not to burn yourself. Sorry I can't be much help on this step, but everybody is gonna have different measurements here and you're gonna have to work it until it looks right to you. Your horns should start to look like this:
 |
| Inch by inch. |
|
This step will take you hours so be prepared to stop and take breaks ever now and then, and please don't forget to take meals. As you lay down the pieces, plug up any and all holes with hot glue. Trust me that will make the next set of instructions (the next post) easier. Once you're done your horns should look like this:
 |
| My new Babies. |
Congrats, you're at the halfway point to completing your own customized pair of cardboard horns. In the next post... or two... or three, I'll go over the process of making the horns textured and sculpted to look like they came off an animal or demon. Fun yes? If there are any questions, comments or advice please leave a comment below, I'd be happy to hear from you and offer any insight I can if needed.
Until next time,
See Ya'll Later!
~Amy


No comments:
Post a Comment